Thursday 28 June 2007

TGRWT#3: Strawberry and coriander - only 4 days left!

A big thank you to everybody who has already sent in their recipes for They Go Really Well Together#3!
There are still 4 days left to write about a recipe using both coriander and strawberries. 4 day's - that's...96 hours?:)

So, let me know about your entry by the 1st of July.

Details of the event are right here.

Hope to hear from a lot of you!

Wednesday 27 June 2007

A pie for the love of cheese

Now, everybody who loves cheese, raise your hands!

Just as I had thought - these hands are impossible to count. My hands were up high as well - and although I don't eat awfully lot of cheese, I sometimes have cravings for it. Today was one of thesa days. I knew what I was going to make - a perfect cheese pie, but unfortunately I didn't know how. After reading some instructions for cheese pies I understood I couldn't go to the store. That didn't sound as desperate as you might think! After opening my fridge I came up with my own pie. 'Is it that perfect one then?' you might ask. Quite. Quite-quite.

At least it's got the perfect pile of cheese in it.

The taste of the pie is quite strong so it's important to choose cheese that is very much to your liking (choose cheese - now say that for fifty times and fast!:)). You may also reduce the amount of salt - I have, after all, caught the flu and eat saltier food that I would normally...mom was a bit whiny about the salt. Dill can be replaced with any other herb you like - this is just what I had at home and what I felt like.


Cheese pie with dill

3 eggs
250 g sour cream
150g + 100 g grated cheese
1/4 tsp salt
up to 1/2 dl dill

1. Mix the eggs with sour cream, add flour, salt, dill and 150 g grated cheese.
2. Take a springform pan (I used 24 cm) and grease it with butter or line with baking paper.
3. Pour the mixture into the pan and cover with remaining cheese.
4. Bake at 200C for about half an hour.


I ate a slice of pie warm with some simple green salad (green leaf lettuce + yoghurt + sugar). It was just the right thing to accompany it, as the pie is rich enough already. Soft on the inside, with a pleasant crust on top. Very cheesy and with a quite strong taste of dill.
It could make a perfect snack, if cooled and cut into small squares. I imagine serving them with a coctail stick and with pieces of sweet red pepper.

I think that the next time I crave for cheese, I'll try adding something else to the pie. For example little pieces of ham and basil instead of dill. Or maybe smoked sausage and oregano. Or maybe, who knows - I might just as well add carrot.

Friday 15 June 2007

A cup of oat milk a day will keep the doctor away.

I'm a true meat-eater and milk-drinker, there's no question about it. There's just the tiny detail that I like to experiment, giving daily food a little twist. I have previously made cashew and almond milk and had inspiration to prepare oat milk after noticing oat milk ice cream while I was in Finland last year during a training camp. I really would have wanted to try it, but honestly - I wouldn't have been able to eat a whole litre of it!

Browsing through the web, I've discovered oat milk is good for one in innumerable ways. It can be useful when you've caught cold, have bronchitis or just feel powerless after a stressful day. For treatment it should be drunk several times a day during a longer period. And what if you aren't able to sleep? In case of sleeplessness and when you've caught cold, drinking a cup of warm oat milk with honey before going to bed should help. The difference between dairy milk and oat milk is also that oat milk is lactose and cholesterol free and is high in fiber. Don't you feel like drinking it already? Oat milk is also a source of vitamin E. So how's it done?


Oat milk
(makes about 7-8 dl)

2 dl oat flakes
3 dl+7 dl water (at least)
1 1/2 tbsp honey

1. Soak the oat flakes overnight with 3 dl of water.
2. Blend the oat flake mixture until smooth and then blend all the ingredients together until smooth liquid forms.
3. Strain it through a fine cheesecloth (which I couldn't find, but used a soft cotton cloth instead)
3. Store the oat milk in the fridge, keeps for some days

I gave you the healthy point of view.
But there's also the tasty point of view.

Oat milk can be a substitution to cow's milk in all kinds of dishes. It gives them an interesting accent. To be honest, I'd rather use it for cooking (in porridges, ice creams, smoothies...) than drinking it by itself, I prefer drinking nut milk and I do drink cow's milk, as you can probably remember. But the taste of oat milk is great for some dishes.
Buying oat milk from a store? I'll leave that to people who have a money tree growing in the backyard. Too bad I've only got flowers and parsley.

Thursday 14 June 2007

TGRWT#3: Coriander and coconut syrup over sunny strawberries

Pairing strawberry and coriander for the flavour pairing event They Go Really Well Together#3 has got me excited.
Well...not always. It's true that this dish was the first one that actually made me use fresh coriander leaves, but its seeds have been good friends of mine for a long time. So of course I thought these friends could give me a hand. But when I wanted to make strawberries with coriander-flavoured chocolate...no matter how much ground coriander seeds got mixed into the chocolate, no flavour whatsoever revealed itself. I know chocolate has a strong taste and I know that strawberries in chocolate taste heavenly even when only dipped into crushed almonds and even without doing that, but I got mad at coriander seeds (I got mad at coriander seeds) and just went and bought fresh leaves.

Luckily. Because this dish here ain't no weird experiment! This dish here makes my mouth water like Niagara Falls. I found the idea of adding coconut milk to coriander syrup on the Internet and created a recipe that would suit my taste the most.


Coriander and coconut milk syrup
(about 3 1/2 dl)

2 dl sugar
2 dl water
1/2 dl chopped coriander leaves
1 dl coconut milk

1. Combine sugar and water in a saucepan and heat, stirring until sugar dissolves.
2. When the syrup starts to boil, remove it from heat and add coriander leaves.
3. Leave the syrup alone to cool for 20 minutes and then strain it.
4. Add coconut milk to the strained syrup and mix well.


This syrup is moderately sweet and if tasted, coconut strikes first, but coriander taste will stay in the mouth afterwards. It isn't overwhelmed by neither of the components. I imagine it on pineapple cake, I imagine it on ice cream, I imagine it with bananas.

And I imagine it on strawberries. You can add whipped cream when serving this dessert, because a strawberry dessert is not a true strawberry dessert without whipped cream!

The flavours of strawberries and the syrup 'go really well together' and complete each other. Who could have guessed? Okay, but who could have guessed them to go that well together? It might be a matter of taste, but I was positively surprised. Coconut had been like a missing link in the combination for me. I believe the syrup is a keeper. On strawberries or on anything.

Now I'd like to remind that the deadline for sending in your strawberry and coriander recipes is on the 1st of July. Hope they go really well together!

Tuesday 12 June 2007

Is it...is it really ICE CREAM inside there? Chocolate truffles full of surprise.

I discovered this idea a lot of time ago on Epicurious and was stunned. Ice cream? Like in chocolate? At my very house? Back then I was s-t-u-n-n-e-d. I did try it once and failed completely. Completely. But the thing with people is that they're given a lot of second chances. So I decided to use mine wisely.

Bad news - making ice cream truffles wasn't easy-peasy (although there were some comments on Epicurious claming that - are these guys proffessionals or something?) Good news - people have shared tips and so will I. So here's a list of tips I collected from comments and remember from my own experience.

1. Use ice cream with dense structure, some brands have a lot of air whipped into them.
2. All the utensils you use should be really cold, i.e. consider keeping your spoons and baking sheet (or whatever you plan to place the truffles on - I love our silicon mat) in the freezer.
3. If the truffles aren't coated well, dip them for a second time - coverings will also stick better.
4. You can work practically in your freezer, taking every ice cream ball out individually. More running, but less melting - your choice.
5. Don't touch the ice cream with your hands in order to prevent melting.
6. Ice cream with higher fat content won't melt as fast as light ice cream - this is NOT the moment to be scared of a bit more fat in your dessert.
7. White chocolate may be easier to work with as it doesn't harden as quickly as dark chocolate
8. Melt chocolate in small batches because melting ice cream will make it less effective for coating. You don't want a bowlful of ice cream mixed chocolate (maybe you do, but I assure you - this is not the moment!).

Be sure to remember these tricks if you plan to try these truffles out. This is the overall idea. Find ice cream brands and chocolate that go together well, coat the truffles with chopped nuts, coconut flakes...or leave them without coating.


Ice cream truffles

Ice cream of your choice (preferrably high fat content and dense structure)
Chocolate
Vegetable oil (about 1 tsp for 125 g of chocolate)
(Chopped nuts/coconut flakes)

1. Scoop out little balls (about 1 1/2 - 2 cm) of ice cream and place them onto prepared baking sheet, foil or whatever dish you plan to place the truffles on and put it in the freezer. According to your speed - prepare several and then - into the freezer! New ones and again - into the freezer! That's to maintain the shape of the balls.
2. Let the ice cream balls stay in the freezer for several hours or even overnight to continue on the next day.
3. Melt chocolate over a waterbath (the first batch of it, not all of it) and add vegetable oil to it.
4. Dip ice cream balls into chocolate (using a fork is a good way to do so) and place them onto baking sheet or foil, then put them back into the freezer.
5. To coat the truffles with chopped nuts or coconut flakes, place these into little bowls and roll chocolate covered ice cream balls in them before letting them cool. Another way is to cover frozen truffles. Melt a new batch of chocolate and dip the truffles into it, rolling them in chopped nuts or coconut flakes afterwards, then freeze again.

Serving these to guests would be wonderful. Or rather seeing the first one of them biting a truffle, then squeaking in surprise. Excuse me for being an amateur cook, but I surely would squeak! Ice cream and chocolate melting into each other...just make a dish into just one bite and it will taste so much better!

Friday 8 June 2007

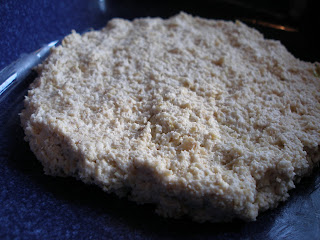
And for breakfast? I'm craving oat flake scone.

Well, summer mornings cannot be escaped, so I'm returning to them once again. With the intention of throwing all bread out of the kitchen cupboard to eat scones every day. With some quality butter and slices of tomato or cucumber or cheese or lettuce... every day. I've fallen in love with this recipe, that uses my A-list ingredients curd cheese, oat flakes and barley flour. Fortunately there's a morning every day.

This recipe does allow variations. If you haven't got curd cheese, you might as well use thick sour cream or sour milk. Feel free to add herbs or spices - for example caraway seems like a good option.

Oat flake scone


200 g curd cheese
1 1/2 tbsp oil
1 1/2 dl oat flakes
1/2 dl barley flour
1/3 tsp salt
1 garlic clove, smashed
1/4 tsp soda

1. Mix together all the ingredients.
2. Spread the dough onto a baking tray that is greased or covered with parchment paper (better option) and form it so that it's about 1 1/2 cm thick.
3. Bake at 220C for about 30 minutes.
4. Serve warm.


The outside of the scone is crispy and golden brown, the inside is soft - the favour of curd cheese. One garlic clove gives quite much taste, but if you want it really garlicky, you may add another. The scone has the flavour of roasted oat flakes, barley flour gives an additional earthly flavour, again. Just get some good butter and it's actually all you need to enjoy the scone, but a ripe tomato or two are a healthy and welcomed bonus!

So is riding roller-blades instead of a bus, as I discovered yesternight.

Wednesday 6 June 2007

TGRWT#3 is here!

This month Martin from Khymos.org asked me to host the fabulous They Go Really Well Together foodblogging event, which has only reached its third round.

Never heard of the event? Really? Or just curious whether it really is what you think it is? Well, TGRWT is about pairing ingredients that have similar volatile aroma compounds. Or in less words - smell alike. It is about bringing together certain ingredients just because chemistry tells you to do so. Why are we talking about smell, but not taste? It's been discovered that only 20% of what we "taste" is perceived by the tongue and 80% by the receptors in the nose. Ingredients that have similar volatile aroma compunds should, in theory, go together well. Wanna test?

Round one was hosted by Martin himself and used garlic, coffee and chocolate, round two was hosted by Tara from Should you eat that and mixed together banana and parsley. This month's theme is my favourite so far. Get ready for cooking with... (can you feel the excitement?)

Strawberry and coriander!


The rules of TGRWT#3 are as follows:

  1. Prepare a dish using strawberry and coriander. Use an existing recipe or create your own. You can use whatever ingredients that you like besides these two in you dish.
  2. Post about the recipe in your blog (with TGRWT#3 in the title!) and add a photo of it. Include a link to this post and a link to the round-up once it has been posted. Readers will be particularily interested in how the flavour pairing worked out, so make an attempt at describing the succession of taste and aroma and whether or not you liked the dish and why.
  3. The deadline for posting is the 1st of July
  4. Send me an email at evelingrauen (at) hotmail (dot) com with the following details: your name, the country/city where you are from, the name of your blog, the URL of your post and a picture of your dish to include in the round-up.
  5. The round-up will be posted in a few days after the 1st of June
  6. If you don't have a blog, but want to take part of the event, just email me your entry with your details and description of the dish - I will gladly include it in the round-up.
Now off you go to buy fresh strawberries and coriander! Or feel free to use coriander seeds, dried strawberries, strawberry juice...whatever you like. And don't forget - let me know how things worked out in the kitchen by the 1st of July.

Still curious?
Learn more about flavour pairings and what Martin has to say about the combination of strawberry and coriander in his blog.

Good luck! Don't burn your fingers!

Tuesday 5 June 2007

An almost traditional green summer salad

There's rhubarb season all over food blogosphere and I've been able to miss it. Well, not really as my fridge still is packed with rhubarb stalks all the time and every weekend comes with a new pile of them, fresh from my grandmother's garden. No way we could eat them all fresh by just dipping them into sugar. Although on a second thought... still, no. Rhubarb is a gifted fruit, managing well in both sweet and savoury dishes. This time however this fruit is just an addition to a lovely summer salad, something almost traditional.

To speak of traditions, our family's most traditional summer salad is simple chopped green leaf lettuce with sour cream and sugar, often with radish. This is what my grandmother makes. This is what my other grandmother makes. This is what my mother makes. This is what we all love.

Everything was just fine until I came with the idea of adding yoghurt instead of sour cream or adding pineapple or walnuts or whatever. And from time to time, instead of the old and safe we eat the new and improved. For me the old and safe is very often the base for lunch in summer, for who'd like to eat heavily with this weather. This my today's try. Which I ate. Alone. Double the recipe, for heaven's sake!


Green summer salad
(serves one as a light meal or two as a side dish)

3 dl chopped green lettuce (we prefer 'chopping' with scissors)
1/2 dl chopped green onions
1/2 dl chopped rhubarb
1/2 dl chopped radish
1/2 dl yoghurt
1/2 dl cottage cheese
1-2 tsp sugar
pinch of salt

1. For the salad sauce mix together yoghurt, cottage cheese, sugar and salt.
2. Mix all ingredients together or set them in layers

Although setting the ingredients in layers looks really nice and really really nice, I prefer mixing the salad, because, you know, eating is not only about aesthetics. The salad is quite sweet and that is what I'm used to, but I suggest using only 1 tsp of sugar if you're not a sweettooth when it comes to lettuce. But the freshness, the everything - summer wouldn't be here without this salad. For me it is time for some sun and workout now!