Monday 7 July 2008

Tomato cake, the sweet and spicy type

First point. I've now understood that vegetables do deserve their places in sweet cakes. They make them moist and therefore good. And I understand that before I've even tried beetroot-chocolate cake or chocolate cake with sauerkraut.

Second point. I haven't yet understood why vegetable cakes always hide their flavour behind a heap of spices or chocolate. Would they really be that bad otherwise? I haven't tried a version without them myself, but it seems as though we're just using the vegetables, isn't it? I mean, I'd be insulted, it's like dating a man but begging him to wear a paper bag on his head.

Third point. In case of a tomato flood at your house (I'm looking forward to ours...), this recipe is a great way of smuggling tomatoes into a dish. Just peel fresh tomatoes by scaring them with boiling water until the skin wants to come off by itself.


Spicy tomato cake with curd cheese frosting
(Adapted from Maria Öhrn's 'Tårtor' (Cakes))

100 g butter at room temperature
2 1/2 dl soft brown sugar (I used 2 dl of caster sugar and 1/2 dl of dark syrup instead)
3 eggs
3 dl pureed canned tomatoes (beware, they have to be in their own juice, not marinated)
5 dl flour
1/2 tbsp baking soda
1/2 ml ground nutmeg
2 ml ground cloves
1 tsp cinnamon
100 g walnuts (I used hazelnuts instead - a very tasty adaption!), chopped to pieces

frosting:
400 g curd cheese (cream cheese could be used instead)
2 dl heavy cream
sugar
vanilla
1 1/2 tsp lime juice
  1. Beat the soft butter together with the sugar until fluffy.
  2. Add eggs one by one and then pureed tomatoes.
  3. Mix flour with spices and baking soda, then add to the batter. Add chopped nuts.
  4. Grease a 24 cm springform pan and pour the batter into it. Bake at 175C for 40-50 minutes, until a toothpick comes out clean. Let cool completely.
  5. Beat the heavy cream and sugar with an electric mixer until whipped, then add curd cheese. Flavour with extra sugar (if needed), vanilla and lime juice.
  6. Cut the cake into two and spread the frosting both between the layers and on top. The cake is good served immediately, but it's better after a few hours.


It's primarily a spice cake. I tried to trace tomato flavour (thinking of tomato juice), but it was quite hard. I think I noticed a bit of it, but that's as far as my noticing goes; I can't be sure:D

The spice combination kind of gets it and the cake is nicely moist, even if it doesn't look so apparent on the photos. The curd cheese frosting came out really nice and fitting, but I tend to think that sour cream could have been a cooler ingredient here. Even more in harmony with the whole spicy cakey thingy (and it's not that I thought about our family's all-time-favourite tomato salad with sour cream...).

Thursday 3 July 2008

Roasted banana ice cream with poppy seeds

Mayhaps you too went to search for some good bursting red tomatoes this one morning and encountered a bunch of blackened bananas instead. No bursting red tomatoes. Sad moment. The bananas looked kinda scary as well. Another sad moment.

But the thing with bananas is that they tend to be villainy. I mean, scaring me like that and then turning out to be perfectly lovely on the inside.

Makes me think I never really cared about the tomatoes anyway.


This is my first attempt at cooking a recipe from apparently the Bible of ice cream, David Lebovitz's The Perfect Scoop. But still I couldn't help but mess with it, dear me.


Roasted banana ice cream with poppy seeds
(adapted from David Lebovitz's The Perfect Scoop, via butter sugar flour)

3 medium ripe bananas (totally ripe suits as well;))
75 g brown sugar
3 dl milk
1 dl curd cheese (using cream cheese would also be good)
2 tbsp caster sugar
2 tsp lime juice
vanilla (1/2 tsp extract)
1/4 tsp salt
at least 1 tbsp of poppy seeds
  1. Preheat the oven to 200C.
  2. Slice the bananas and place into a small baking dish together with the brown sugar. Bake for about 40 minutes, until the bananas are caramelized. Turn once during cooking.
  3. With the help of a food processor, blender or immersion blender, puree the bananas together with the syrup from the baking dish, milk, curd cheese, sugar, lime juice, vanilla and salt until smooth. Add poppy seeds.
  4. Chill the mixture in the fridge until cold.
  5. Churn in an ice-cream machine until thick or place in a plastic container, pop it in the freezer and give it a good whip every hour or every few hours, depending on the temperature of your freezer.

The words banana ice cream never make me drool, actually, as I tend to think of store-bought ice cream pops that carry the same unmistakable banana essence flavour that all banana-FLAVOURED sweets have in them.
Maybe you've seen yellow banana-shaped jellybeans. Well, there must be a reason to their shape. Nobody would understand they're supposed to taste like bananas, is what I'd reckon.

But roasting really intensifies the taste of the bananas. It's not just banana-flavoured ice cream, it's actually banana ice cream. Which, you know, is a totally drool-worthy dish. The poppy seeds? They were the only thing I felt was missing from the ice cream, that's it.

The recipe will also be taking part of the fab event Frozen Desserts, hosted by Mike of Mike's Table.

Wednesday 25 June 2008

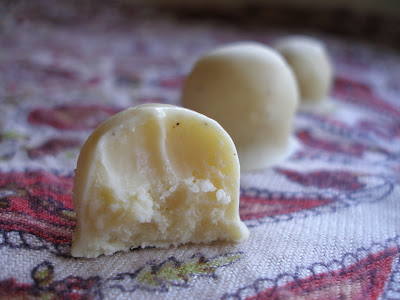
Rosy rhubarb truffles

I'm excited. First it was coco-nutty prunes in white chocolate and the road towards salvation (read: knowing the perfect ways to make truffles from fruit and berries) started showing itself. I mean, there are actually a million possibilities.

Then rhubarbs came.

And then I realized how much I really love myself the concept.


Rosy rhubarb truffles

300 g rhubarb stalks (two bigger ones or three smaller ones)
2 dl sugar
2-3 tbsp rosewater
white chocolate
(chopped almonds or almond slices)
  1. Peel the rhubarb stalks (if the stalks are young, you can just cut them without peeling) and cut to bite-size pieces. Place the pieces into a saucepan and add the sugar and rosewater on top.
  2. Cover with lid and heat until syrup forms from the sugar and rhubarb juice. Boil at low heat until tender, but not broken (about ten minutes), occasionaly gently stirring or turning the pieces around.
  3. Let the rhubarb cool down in the syrup, preferrably let it soak overnight.
  4. Pat the pieces a bit dryer on paper towels and reserve the syrup for later use. Melt white chocolate over a waterbath and dip each piece into it (if you wish, also dip them into almond pieces after the chocolate), then place on foil for hardening. Keep in the fridge, but take out a bit before serving.

The rhubarbs are tender, with rosy cheeks and sweet white coats. The rose flavour is quite moderate and although the filling is sweet in itself, it really needs the extra sweetness from white chocolate, rhubarb being sour in its very essence. You could add more sugar or more rosewater if you want a more instense bite, I don't mind!:)

Last time I added almond bits to coat the chocolate and the sensation was even better with a crunchy addition, so I'd definitely do it next time too. The leftover syrup can be made into a very good drink by adding water.

Next I'm thinking pears poached in black tea with bitter chocolate and hazelnuts. And then from there...

This post will take part of the first round of the event Original Recipes, hosted by Lore of Culinarty.

Thursday 19 June 2008

Granny got twisted

Now, don't be afraid if you've never heard of mayo cookies before. They're perfectly alright, perfectly sweet and actually quite perfectly perfect.
(And if you're still afraid, consider the ingredients of mayonnaise for a second - they're actually all used in sweet cookies too, you see! yeaaah!)

My grandmother is an expert and no matter how many times I try, I'll never get them that right. Maybe that's why I decided to give her mayo cookies my own twist, adding white chocolate on top (the best of ideas - she'd be proud of me). The first time I made them, I accidentally made them according to her original quantities which resulted in the whole kitchen being filled with cookies. Oh, you know, grannies and their recipes...


The quantities are reduced here, you shouldn't be afraid of flooding your kitchen with cookies if you plan to make them. (not that that's a bad thing, it just came unexpectedly to me)


Mayonnaise cookies with white chocolate

100 g mayonnaise
100 g butter, at room temperature
4 dl flour
2 dl sugar
1 egg

White chocolate
  1. Mix butter well with sugar, until the mixture becomes fluffier.
  2. Whisk in mayonnaise and then the egg. Finally add the flour.
  3. Place the dough into the fridge for 30 minutes.
  4. Make small balls of the dough between your fingers, place them onto a buttered baking sheet and flatten with a fork.
  5. Bake at 190C until slightly golden at the edges, about 9 minutes. Let cool.
  6. Melt white chocolate over a waterbath and decorate the cookies with it. Spread it on top or make other decorations. Let them cool for the chocolate to harden.
I must admit it - the batter tastes funny. But that's okay, because the cookies end up being sweet in that good childhoody way. That's the best way to put it, actually, the flavour is difficult to describe. But they're utterly delicious and the white chocolate gives them another sweet kick, making the final result girly and - again - childhoody.

Sunday 15 June 2008

Fennel bites with liver pâté

I sometimes have this habit of eating while I'm reading. Or rather, reading while I'm eating. Or, well, I don't know. I often spend my mornings like that when I don't have time for both eating slowly and devouring the morning newspaper, two things that make a morning complete (add morning workout and I'm in heaven).

But this one day I was deep in a book when my stomach called for lunch, so I just prepared some easy bites for myself to enjoy while reading on. Non-fat for fingertips, full-fat delight for that stomach of mine.

And those bites now totally want to visit a party with snacks.

Fennel bites with liver pâté
Fennel bulb
Liver pâté
Fennel greens, dill or chives for decorating
  1. Cut the fennel bulb in half and cut its layers into nice bite-size 'boats'.
  2. Top the fennel bites with liver pâté. Use a pastry bag for this or make a nice heap with a teaspoon.
  3. Place fennel greens, dill or chives on top for great taste and decoration.
It's amazing how the flavours suit together. The sweetness and freshness of the fennel is just what a bite of liver pâté needs in order to be reached for again and again. It balances the strong and rich pâté perfectly. That's why I was especially fond of the thick fennel slices - the pâté does want something fresh at its side (hence the usual company of cucumber).
I used dill on top of the bites and believe I'd enjoy it more than just fennel greens as it makes the flavour pattern wider.

Yep, I recommend.

This post will take part of the first round of the event Original Recipes, hosted by Lore of Culinarty.

Thursday 12 June 2008

Warm curd cheese toasts with feta cheese and smoked sausage

Curd cheese toasts (or rather 'kohupiimasaiad') are sweet (sorry if I'm confusing you, but usually they are) Estonian treats we usually make during wintertime when stale bread seems to be lying around everywhere and curd cheese just happens to be in the fridge. They're delicious for a dessert and delicious for breakfast the next morning. Check out Pille's recipe, for example, cause this will be the last time you hear about sweet curd cheese toasts from me today.

INSTEAD, our curd cheese toasts went un poco loco. That's what confused appetite does to a person, because I really craved something savoury.

You could try using ricotta instead of curd cheese here. Or even cream cheese for a richer treat. Though as long as I've got curd cheese, I wouldn't even look towards those two...


Warm curd cheese toasts with feta cheese and smoked sausage
(makes 6 toasts)

about 6 slices of bread

250 g curd cheese
1 egg
1/2 - 1 onion (according to your love for onions)
butter
about 1/2 tsp dried herb mix of basil, oregano and marjoram (you could also use only one of them)
20 g smoked sausage of salami (I used deer sausage)
50 g feta
about 1 dl grated cheese
salt, pepper, sugar
  1. Dice the onion and sautee it in butter until it becomes transparent and slightly golden, about 10 minutes.
  2. Finely dice the sausage and also dice the feta.
  3. Mix the egg into the curd cheese, add the herb mix, sausage, feta and sauteed onion. Flavour with salt, pepper and a bit of sugar.
  4. Lay bread slices onto a greased baking sheet and spread the mixture onto them.
  5. Bake at 200C for 10 minutes, then add the grated cheese on top of the toasts and bake for 5 more minutes. Serve warm.
Nothing is overpowering the taste in those toasts, just like in good pizza. The bread is crisp, the filling warm and creamy. They're good just on they're own, with slices of fresh tomatoes on them or together with a fresh salad for a lunch-er lunch.

Weird how dishes as ordinary as kohupiimasaiad can sometimes surprise so much:/
Just the weirdness I love!

Tuesday 10 June 2008

Appetising lettuce rolls with smoky red fish

All kinds of snack rolls are essentially cool. But as is the case with most dishes, there's something inside us screaming 'I WANT TO EAT SEASONAL'! And despite all the coolness factor in ham rolls with cheese filling, I don't quite feel like them now. Come on, it's not even raining. And the hold-your-skirt-or-you'll-go-home-without-it wind does not really count.

Even though I didn't know it before, I now know that lettuce can be rolled into a cool summery appetiser.

That's why they invented the phrase sex, drugs 'n' lettuce rolls, baby!


Lettuce rolls with smoky red fish


lettuce leaves
light grapes
raisins

about 200 g garlic flavoured cream cheese
1/2 dl diced tomatoes
1/2 dl pieces of smoked red fish
1 tbsp raisins
  1. Mix cream cheese with diced tomatoes, smoked fish and raisins.
  2. Spread the mixture onto lettuce leaves and make them into rolls. Place them into the fridge for a half an hour (I didn't do that, but it will make the filling stiffer).
  3. Cut the rolls into bite-sized pieces and top with a grape and a raisin.


They actually have this fresh feeling to them, which is unusual for this kind of appetisers. There's just about enough smoky fish flavour that is complemented by the sweetness of the raisins. The grapes are good on the rolls, but I'm wondering if olives would do an even better job. Next time, right?

Friday 6 June 2008

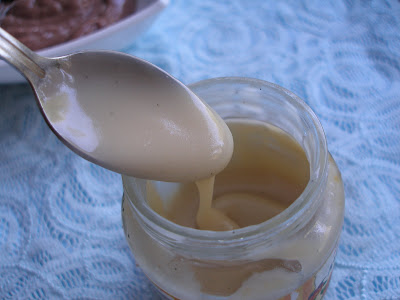
Overdose of sweet from coconut honey

When I take home a can of coconut milk, it's almost always with the thought 'I have no idea where it's going to take me this time'. Sorry if I'm making it sound like an adventure story, but guessing where the canful will eventually end up is like guessing where Indiana Jones will find himself after climbing down a suspicious ladder.

Poor coconut milk found itself in a jar this time, stuck in there together with some sticky good honey and vanilla seeds.

Never seen Indiana Jones in a sweet situation like that after climbing down any ladder, that's for sure...


Coconut honey with vanilla

3 dl coconut milk
1 dl honey
half a vanilla pod
1 tbsp butter
  1. Measure coconut milk and honey into a saucepan. Cut the vanilla pod in half and add.
  2. Boil the mixture without a lid over low heat until it turns thicker, about 15 minutes.
  3. Add butter.
  4. Pour the mixture into a jar, close it and leave to cool at room temperature. Store in the fridge.

So what does it taste like? Imagine the word pair 'coconut honey' melting on your tongue, sweet and gooey, girly from the touch of vanilla.

I had my first taste on a chocolate dessert with bilberries, but I imagine it being syrupy good on ice cream or just plain yoghurt. And I'd like to drizzle it onto a bowlful of fresh strawberries. How's that for adventurously good?

This recipe will also take part in the A Fruit A Month event hosted by Tasty Palettes, themed Coconut. Coconut's a fruit, my friends, a fruit:)

Thursday 5 June 2008

Coffee curd cheese with clove-scented bananas and almond praline

When concerning recipes, I often start my thought process from flavour combinations, as opposed to types of dishes or preparation methods. It gives the thought more free will and results in fantastic ideas more often (though some of them might be impossible to make or far too difficult for me...far too difficult to make them perfect)

Just as I stated, there's no escape from curd cheese on this blog and this time it's a tribute to the combination coffee-cloves-bananas-almonds. Actually the bananas are the X in this equation, successfully replaced by nectarines, peaches or apricots.


Curd cheese with coffee, clove-flavoured bananas and almond praline
(serves 3)

400 g curd cheese (smooth type, paste)
about 1 tsp coffee essence (can be substituted with instant coffee powder)
about 2 1/2 tbsp sugar
vanilla
1 banana
3 tbsp sugar
1/2 tsp ground cloves
almond praline (e.g. this)
  1. Mix curd cheese to taste with instant coffee powder or coffee essence, sugar and vanilla.
  2. Combine sliced banana, sugar and ground cloves on a skillet. Heat until the sugar has turned into a light caramel around the banana slices. Occasionally stir and turn the slices around.
  3. Crush the almond praline to little pieces.
  4. Serve the curd cheese with warm banana slices and crushed praline.
The bananas turn really soft in the caramelizing process and adopt quite a strong clove flavour that goes together incredibly well with the coffee flavour of the curd cheese. There's basically everything one could want from a dessert - the creaminess of the curd cheese, the stickyness of the bananas and the crunch of the praline, plus three intense tastes that dissolve into one another.

Sunday 1 June 2008

Forest pesto

My affection towards fresh bright green fir shoots has not decreased since fir shoot butter. Just mixing them with butter was an easy task, but I needed something more.

I hope you're not so pesto-conservative as to throw me with rocks if I call my creation pesto. Forest pesto, because fir shoots are picked from the forest (the air is the cleanest there, so you should do that if you can) and also because hazelnuts are called 'forest nuts' in Estonian. Clever, huh?;)

Forest pesto

50 g bright green fir shoots
25 g hazelnuts
1 garlic clove
1 tbsp grated parmesan
about 4 tbsp olive oil
salt
  1. Process the fir shoots, nuts and garlic together with a bit of oil in the food processor or with an immersion blender. The mixture should be quite smooth.
  2. Add cheese and enough olive oil to get a right consistency. Flavour with salt.
Use just as you would use basil pesto. On pasta, on bread...especially on bread and definitely with the addition of cream cheese and some slices of bursting red tomatoes.

The flavour is incredibly fresh.
Imagine standing in a fir forest. Take a deep deep breath. Good, isn't it? Now add a bit of a sour tone to it, the mildness of hazelnuts, the flavour of good parmesan, a bit sharpness from garlic and you're ready.
Then serve this feeling with bread, cream cheese and tomatoes.

If you have never tried fir shoots, I demand you to do so now! No excuses!

Thursday 29 May 2008

Hazelnut rum balls

Chocolate-y rum balls made with cookie and cake crumbs are quite a classical favourite treat for me. I think I've tried almost every kind they sell in Estonia, I've chosen my favourites and over time I've eaten a ton. A big ton, not a small one. A ton of rum balls.

Although I've never succeeded in making the perfect rum ball at home, I've now succeeded in making quite a perfect variation of it. Hazelnuts have always seemed like good company for a decent rum ball and condensed milk is probably good company for anyone interested in the very quintessence of company.


Pardon for the blurry pictures. I had a bunch of wide-smiled compliment-throwing hungry friends over and they didn't like the idea of leaving any truffles alone.

Hazelnut rum balls

2 dl ground hazelnuts (if you have time - from about 200g hazelnuts, dry-roasted on a skillet and rubbed while warm in a cloth to remove peels)
1 dl cookie or cake crumbs
1 tbsp unsweetened cocoa powder
2 tbsp butter
1 dl sweet condensed milk
vanilla
rum essence
dark chocolate and hazelnuts for decorating
  1. Mix ground hazelnuts, cookie crumbs and cocoa powder well.
  2. Melt butter and mix well with condensed milk. Add rum essence and vanilla, then pour the mixture over the dry ingredients and mix very well.
  3. Place the mixture into the fridge for a half an hour, make small balls from it and then let them harden in the fridge again.
  4. Melt dark chocolate over a water bath, dip the balls into the chocolate and place them onto foil or parchment paper. Before they harden, decorate each ball with a hazelnut. Store in the fridge.
Although the taste differs according to the crumbs you use, the flavour of hazelnuts is still nicely obvious. Teasingly flirtatious with the rum flavour in the truffles, it really creates a good mild combination that goes together really well with chocolate.

The balls are best eaten when they've spent a day in the fridge. The taste is smoother, the texture is harder, the delight is grander.

The rum balls will also be taking part of this month's Waiter, there's something in my... event, themed Dried fruit and nuts which is hosted by Andrew of Spittoon Extra.

And in the Monthly Mingle event, hosted by Mansi of Fun and Food, themed Appetizers and Hors'Doeuvres.

I really have to make these rum balls when no guests will be coming around;)

Sunday 25 May 2008

Lemon truffles with a pepper-warm coating

Sneaky truffles, I'd say. In a sense that their lemon-y filling and pepper-warm coating together create an almost healthy feeling in your mouth. Lemon-y and warm. Just like a cuppa hot tea, only that actually you eat a handful of truffles!;)

Lemon and black pepper are another great combination magnifico that I strongly advise to try in all variations that come to mind!

Lemon truffles with a pepper-warm coating
(makes about 30)

200 g white chocolate
½ dl double cream
at least 1 tbsp lemon juice

160 g white chocolate
¼ - ½ tsp black pepper

  1. Chop the chocolate to little pieces.
  2. Heat the double cream to boiling point and pour it onto the chocolate ight away. Mix well, until the mixture is smooth. Add lemon juice. Place the mixture into the fridge for about a half an hour.
  3. Make little balls out of the mixture and then place them into teh fridge to harden for some more time.
  4. Melt te remaining chocolate over a waterbath and add pepper to it. Coat the truffles with this chocolate and let them harden on foil or on parchment paper. Store in the fridge.

White chocolate, that often feels so cloy, gains freshness and vividness from the lemon juice. If white chocolate were a lady of respectable age then in these truffles she'd certainly be young again...:) At first the pepper is a balancing flavour but in the end it leaves the mouth sighing warmly in the most pleasant way possible. Contrasts and novelty. Freshness and warmth.

One thing's for sure. Black pepper declares itself as a true dessert spice. I recommend to remember that;)

This entry also participates in the most gorgeous food blogging event of all, Sugar High Friday. This time the host is the wonderful Helen of Tartelette and the theme (again!) CITRUS.

Thursday 22 May 2008

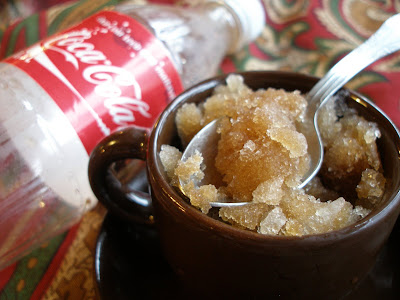
Favourite ice tea smoothie

I'm quite a fan of tea. Not an expert, rather quite far from the worst expert ever there is. But I love my tea: sometimes with herbs or flowers we've picked ourselves, sometimes great quality black, usually green and always without sugar.

And I crave quite everything flavoured with tea (especially when it's this cake). This dessert however, breakfast or whatnot is as easy as it gets, but it's great when made with different teas. You know, something different each time!

Favourite ice tea smoothie
(serves 1)

2 dl yoghurt
1 dl strong tea (any kind), cooled
about 1 1/2 - 2 tbsp sugar
(vanilla)
(ice cubes)
  1. Mix tea with yoghurt, adding as much sugar as you like. If desired, flavour with vanilla.
  2. Enjoy with a straw or with white moustache!;) Add ice cubes, if desired.
The smoothie is only as good as you make it;) Good tea equals good smoothie, subtly sweet, thin enough to drink smoothly through a straw. I guess it's a good variation of iced tea for those hot hot days that are yet to arrive..

But it's also a contribution to the Spring Tea Party event held by Erin of The Skinny Gourmet. Now I want to see what people come up with when thinking 'tea'!

Monday 19 May 2008

Pineapple and lime curd with apricots

Warm weather magically disappeared with a 'puff', leaving behind rain and wind and bad mood.

Hey, khm, with no sun here the least I'm worth is a good long TROPICAL VACATION, right?

But with none coming around...I'm gonna have to do with some tropical curd instead, dreaming of ripe (preferrably peeled and sliced) pineapples falling right into my hands from up above while I myself am sunbathing in my new pretty blue bikinis. (Yes, that would totally fix my mood)

So...

Pineapple and lime curd with dried apricots


5 dl pineapple juice
10 dried apricots
3 eggs
100 g butter
2 1/2 dl sugar
vanilla
1/2 dl lime juice
  1. In a saucepan, combine pineapple juice and dried apricots. Boil vigorously without lid until the apricots are soft and the juice is reduced to about 1/2 dl, 20-30 minutes.
  2. Measure out 1/2 of reduced juice and dice the apricots into little pieces.
  3. Melt butter in a saucepan, add sugar and slightly beaten eggs, whisk until combined. Then add reduced pineapple juice and lime juice. Whisk at moderate heat until the mixture thickens.
  4. Flavour with vanilla and add apricot pieces, making sure they do not stick to each other.
  5. Pour the curd into jars, close them and leave to cool to room temperature, then store in the fridge.

The curd has really got a nice pineapple flavour to it, with a huge hint to lime. The apricot pieces are soft and full of taste when stumbled upon with your teeth! It's gorgeous like the classical lemon curd, only better;)
Good with cookies, ice cream, between cakes, pancakes, good to dunk a spoon into to enjoy the sensation of a whole mouthful. Just good.

And this good curd will also take part in the brand new event Putting up hosted by Rosie of Rosie bakes a peace of cake and Pixie of You say tomato...I say tomato that is all about preserves!

Sunday 18 May 2008

Spring shoots!

In april and may, whenever I walk past a fir hedge, I can't help but instinctively reach my hand for some bright green fir shoots. Ah, I don't think I'm the only one doing that (and I mean doing that after the age of ten;)). They are, after all, so pleasantly sour and packed with vitamins.

Fir shoots are actually a funny subject. Because whenever I tell someone that one can use them in actual dishes, in addition to just nibbling on them from time to time while outside, people answer 'ohhh, hmmm, yeees, I've never actally thought about it'.

But fir shoots are really healthy as well, when not polluted by a nearby street. Syrup and tea made with them should work well when trying to get rid of cough and cold, but also tiredness and nervousness. They liven blood circulation and even have a slightly antibiotic effect!
(yes, now would be the right time to stop asking the question 'are you sure it's okay to eat them?')

Here's my first experiment with fir shoots:)

Fir shoot butter

Bright green fir shoots
Butter at room temperature
(sea)salt, pepper
  1. Rinse the fir shoots
  2. If you want a soft butter, throw the shoots into boiling water, boil for about 10 minutes, then chop into little pieces. Using fresh shoots will result in a crunchier, but brighter butter.
  3. Mix the chopped fir shoots with soft butter and flavour with salt and pepper.


It's great to eat the butter with a simple crunchy bread, but I can imagine it being wonderful with meat, vegetables or young potatoes..oh yes. A scrumptious sour fir-y taste, somehow homely.

Next I'd like to throw some fir shoots into casseroles and salads. I've also found recipes for flavoured oil, tea, syrup, chicken roast, marmalade and ice cream coctail using fir sprouts. If you're interested, I'm ready to translate or try them out:)
And if you've got ideas of your own...I'm one big ear!

Tuesday 13 May 2008

Curd cheese mousse with blackcurrant sauce and kiwis

If there was one thing I'd eat for the rest of my life, it would be curd cheese. Or, well, curd cheese and rye bread. But still. I eat it in all kinds of combinations and for me it's mild flavour is so ordinary that I never use recipes. I just enjoy. Enjoy and ENJOY.

But from time to time a combination just nails it. Just like yesterday. And it makes me wanna share. Oh yes it does.

Although the sauce has quite a strong blackcurrant flavour on its own, it's lost a bit if the mousse has a strong cocoa flavour. Therefore, I suggest using a bit less cocoa powder.
Don't be bothered by the blackcurrant pieces in the jam - there actually an extra!

Curd cheese mousse with blackcurrant sauce and kiwis.
(serves 3-4)

400 g curd cheese
1 dl double cream
sugar (about 1/2 dl)
vanilla
1-2 tbsp unsweetened cocoa powder
blackcurrant-cream sauce (see below)
2-4 kiwis
  1. Mix curd cheese with sugar and vanilla.
  2. Beat double cream with an electric mixer until fluffy and add (or if you're lazy - just mix it in and beat the mousse a bit).
  3. Add cocoa powder to taste, mix well.
  4. Peel and slice kiwis.
  5. Serve the mousse with warm or cold sauce and kiwi slices. Add cookie pieces, if desired.

Blackcurrant-cream sauce

1/2 dl blackcurrant jam
1 dl double cream
cinnamon, if desired
  1. Take a small pot and heat the jam until it's liquified.
  2. Add double cream, mixing. If desired, add cinnamon.
  3. Boil the sauce for 5 minutes, then serve warm or cold (might get too thick when waits overnight - then just add liquid) .
The blackcurrant-kiwi-cocoa combination truly is a nice find I've been wanting to try for quite some time and it really worked out well! An upside-down version could also be nice - with kiwi sauce and fresh blackcurrants...(summer, summer, come sooner!)

The mild mousse is well complemented by the strong-flavoured, but slightly sour sauce and exotic kiwis. Adding cookie bits adds crispness, serving the dessert while the sauce is still warm and adding some cinnamon to the sauce makes it more interesting.

More curd cheese coming to you soon enough;)

Monday 12 May 2008

Apples in uniform

What's in an apple? C-Vitamin? Seeds?

Sometimes when you just incidentally happen to eat a whole bowlful, there's also stomach ache in apples. Well...yeah.

But with these apples it's certain - no seeds, no ache (I solemnly swear..), enough C-Vitamin to keep you going and on top of all that there are...apples:)

The first time I tucked fruit into uniform was when I had leftover dough from a pie shell and - I tell you - it's the best way in the universe for using up that leftover dough you'd otherwise end up eating bit by bit, cursing yourself more and more and in the end - having less uniformed fruit to eat;)


Apples in uniform
(serves four)

4 small apples
about 170 g sweet patee brisee
3 tbsp sugar
¾ tsp cinnamon

  1. Peel the apples and cut the bottom parts a bit flatter so they stand up better. Core them, but don't cut through the bottom.
  2. Divide the dough into four and roll each part into quite a thin circle; leave a bit of dough for decorating.
  3. Fill the apples (as much as you can) with a mixture of sugar and cinnamon.
  4. Place the apples onto the dough circles and then wrap them up. Make sure the dough is of the same thickness everywhere and that it's as smooth as possible - you get four nice balls.
  5. Make (2) leaves for each "apple" from the leftover dough and press them onto the "apples". Use a knife to make the leaf pattern.
  6. Bake the apples in a buttered oven dish at 175C for about 30 minutes until they look golden.
  7. Eat while still warm, serve with vanilla sauce or -ice cream.
How sad that I don't have a photo of the finished dessert! Cause the apples are just so nicely golden and round that they make you want to juggle, roll them in your hands or just eat up at once. Below the crisp surface there's a soft apple and the filling has turned into a sweet dark sauce, that complements the slightly more sour apple very well.

A bit of ice cream or vanilla sauce and this dessert should do the trick:)

Friday 2 May 2008

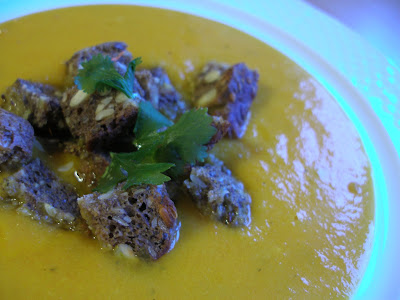
Parsnip soup with smoked cheese and soy sauce

Call it spring stress, call it searching for my muse, call it a stupid gap, but here I am - back after two months without a single post about food. I am terribly sorry, for I must be to be polite, but fortunately (so you can cheer and forgive me right away) I can say that I've found the muse and have some great stuff to show you.

Only that...I have to make most of them again to make pictures. Silly silly me.

This soup stayed a dream for quite some time, until one day I got it all right and I literally went 'mmmmmmmm' till my bowl was empty. I couldn't believe it! There was actually competition to my all-time-favourite carrot soup with coriander and aniseed.

Keep the stock light and your heart open for the best experience.

Parsnip soup with smoked cheese
(serves 4)

300 g parsnip, diced
1 onion, diced
4 garlic cloves, diced
2 dl chicken broth
4 dl milk
100 g smoked cheese, diced
1 tbsp butter
salt, sugar
soy sauce
  1. Melt butter in a soup pot, add diced parsnip, onion and garlic, cover with lid and sautee about 10 minutes, until the onion is transparent.
  2. Add broth and boil for 30 minutes, until parsnip is tender.
  3. Puree the potful, then add the smoked cheese and puree until very smooth.
  4. Pour everything back to the pot, add milk, stirring and flavour with salt and a bit of sugar. Heat up.
  5. When serving, sprinkle with soy sauce.

The soup is full of taste. It has got this sweet flick to it, from the natural sweetness of the parsnip (which, much like the carrot, can cheer up any savoury dish) and also from the essential dash of sugar. The smoked cheese makes it creamier, gives it an attitude, intensifies the taste.

The soy sauce, as the final key to the taste combination, gives the soup the sparkle of life. I wanted to taste a bit with every mouthful, so I just added some more when I'd done with half of the soup. Don't mix it, enjoy it as a contrast, a treat. I'm not a fan of soy sauce, but I love it with red fish and I adore it on this soup.

Wednesday 2 April 2008

Blogging By Mail: Little things

I was excited enough to even forget posting about my BBM package from Glenna of A Fridge Full of Food when I got it last week. And although we now have REAL REAL spring weather, there were big heaps of snow outside at that time.

It was like Christmas. It was the first proper snow of the winter. It was the biggest present I was carrying, climbing over the heaps of snow in our local park-forest. Magic, I tell you.

The moment I got home I RIPPED THE PACKAGE OPEN.
Wonderful! She nailed it!

I've been wanting to try cake decorating and Glenna totally saw it happening. She sent me a package of decorating bags together with a bunch of different tips and four bottles of icing colours.

PLUS a package of Gourmet Jelly Candy. I've been taking these candies to school with me, as a little dessert, one every day. The lollipops are still waiting for me...

Thanks, Glenna, you're sweet!
Oh, I hope my package will reach its recipient in one piece too. Wouldn't want to see all that sweet stuff shaped like one big pancake... Thank you, Stephanie, for organizing the swap!

Saturday 1 March 2008

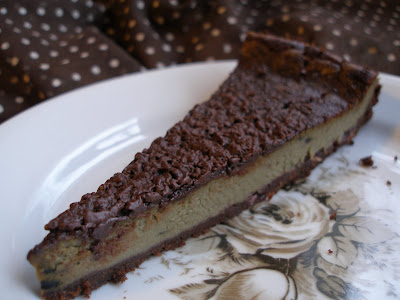
A cheesecake for the minority: Licorice!

Although I'm ill as in really ill right now and almost can't taste a thing, here's a treat I made a month ago. So I TOO could remember what good food tastes like:)

Ohh
, licorice.

There's just too little variety in Estonia. Whenever I go to Finland, I know exactly what I'm going to buy. Always the same licorice candy mix from the ship's Tax Free. Then definitely a package of licorice chewing gum. And if I'm lucky - some licorice ice cream, a tube of licorice sauce to bring home or even a licorice flavoured Tupla chocolate.

Nevertheless I've come upon very few recipes using licorice (candies) as an ingredient. I made a licorice cheesecake with gelatin for a friend mad about the candy two years ago, but at last I made my first baked licorice cheesecake that had been developing itself in my head for too long a time.


I didn't tell my parents of the origin of the cake before they had eaten their first bites. The funny thing...they both liked it. Although neither of them belongs to the licorice-loving minority...very very weird indeed. But positively surprising.

Licorice cheesecake with chocolate and lingonberry jam

180 g chocolate cookies
50 g melted butter
100 g licorice candies (regular)
1 dl heavy cream
500 g cream cheese
3 eggs
1/2 dl sugar
vanilla
1 1/2 dl lingonberry jam
50 g grated dark chocolate
  1. Crush the cookies into a fine powder and add the butter to make the crust. Grease a springform pan (mine was 27 cm), press the crust onto the bottom and up the sides. Bake at 175C for 10 minutes.
  2. Chop the licorice candies into little pieces and combine with the heavy cream in a saucepan. Boil on low until the cream is quite dark (the candies don't have to be dissolved completely).
  3. Pour the mixture into a food processor and process until quite smooth.
  4. Add cream cheese, eggs, vanilla and sugar. Process until smooth and incorporated well.
  5. Warm up the jam (on the stove/in a microwave) and spread on the pre-cooked crust.
  6. Pour the filling over the jam and sprinkle the grated chocolate on top.
  7. Bake for about 40 minutes more.


The overall impression of the cake is quite chocolate-y (I already hear you shouting 'haha chocolate again - and you said you weren't a chocoholic!'). The flavours of chocolate and licorice suit each other very well and a plus side of the melting-in-your-mouth chocolate coating is also that it covers the grey-ish cheesecake (you see? there's a reason for the chocolate!).

The licorice taste isn't overpowering or anything in the final result, but moderatlely present - that explains why my parents didn't spit their mouthfuls out, but rather asked for more.
I hoped the lingonberry jam would be seen more between the layers, but it kind of melted into the crust. Nevertheless it gives it's slightly bitter accent to the cake.


When in search for licorice recipes on the web, I did notice some of them: Licorice pudding from The Well-Seasoned Cook, Licorice ice cream published in the Courier Mail and Martha Stewart's Black Licorice Creme Brulee Tarts.

Maybe you've got your own to share?
Oh, well, I'm off to tea and napkins...